Laserfiche for Oulook Add-in Userguide
Laserfiche Outlook Add-in for Microsoft 365 enables you to:
- Save emails and attachments directly to Laserfiche Repositories.
- Attach documents from a Laserfiche repository to an email.
- Automatically save sent email and attachments to Laserfiche.
Navigating the Laserfiche Outlook Add-in
Under the Home ribbon, use the Save to Laserfiche button to view Laserfiche Outlook Add-in.

Choose where to save the selected email as well as assign template and field information. If the selected email contains attachments, there will be additional import options for each attachment.
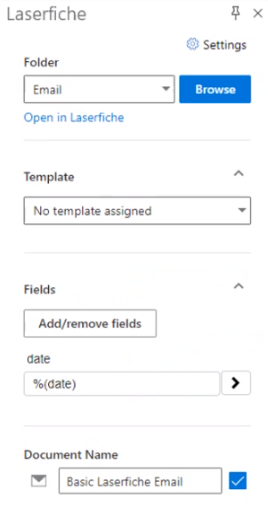
Configuring Default Options
Default options for template and fields can be set on the user level.
- View the Options page in Web Client.
- Click on the New Document tab on the left.
- Make your changes under the Import Email section and click Save.
Note: The account administrator may have set account-wide defaults in the Repository Administration area.
Configure automatically saving sent messages to Laserfiche
When Save on Send is enabled, all sent emails will be automatically saved to the specified Laserfiche repository by the Laserfiche Outlook Add-in.
Note: This feature is only available for new Outlook, Outlook on the web, and Outlook for Mac.
Warning: If enabled and classic Outlook is used, an error message will be displayed and the user must select Send anyway for every sent email.
Navigating the Save on Send Settings
When writing an email, in the Message ribbon, use the Laserfiche button to open Laserfiche Outlook Add-in. Then select the Save on Send tab.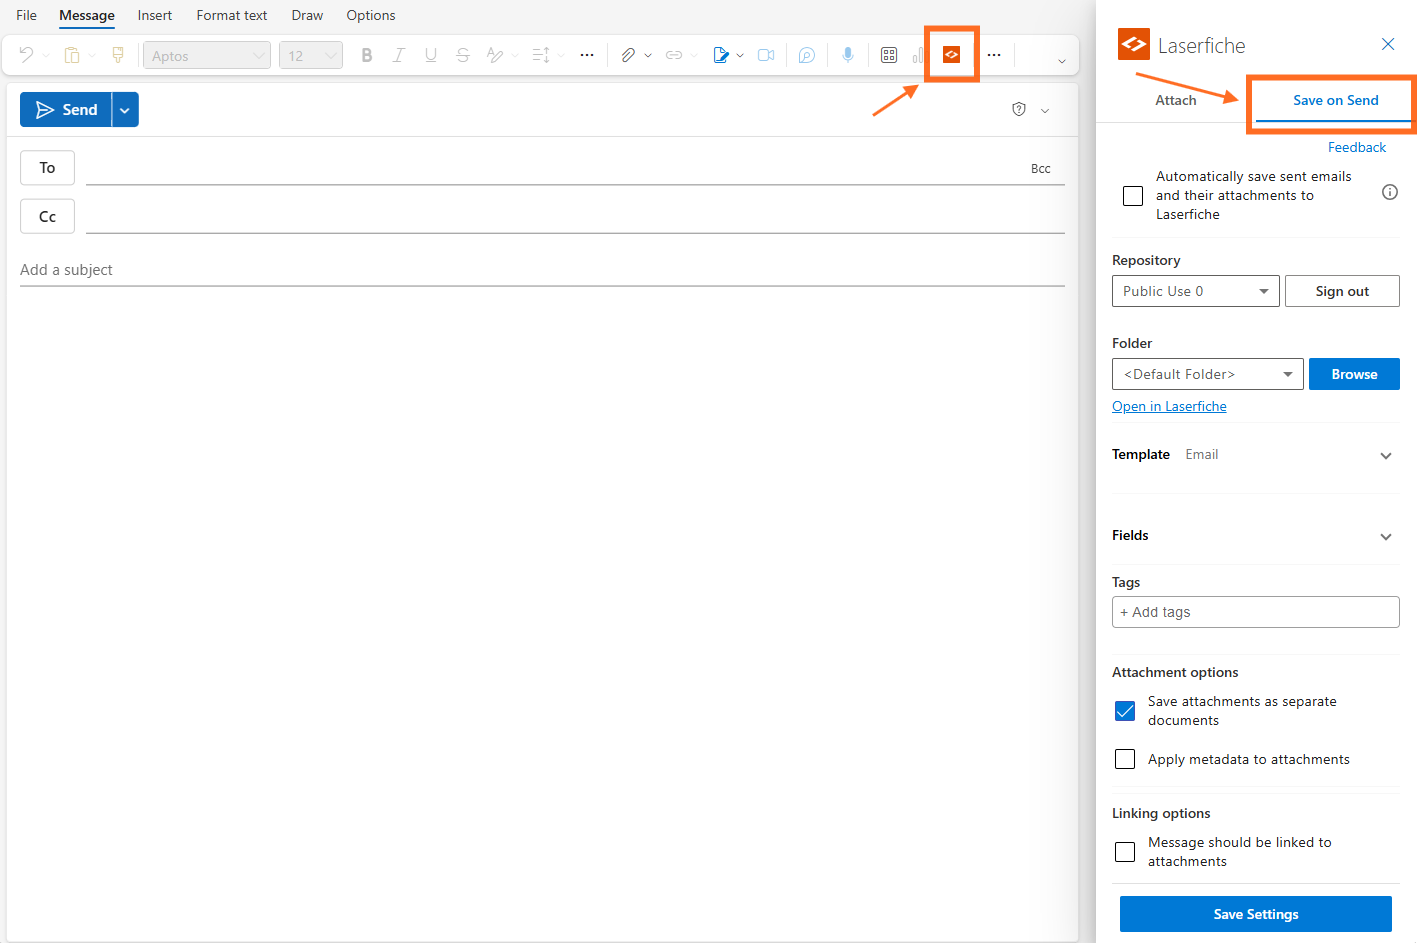
User Opt-In required to enable this feature
By default, the feature is turned off for each user. To activate it, users
must go to the Save on Send settings, enable the feature, verify that the repository and default folder are correct, and save the
settings. 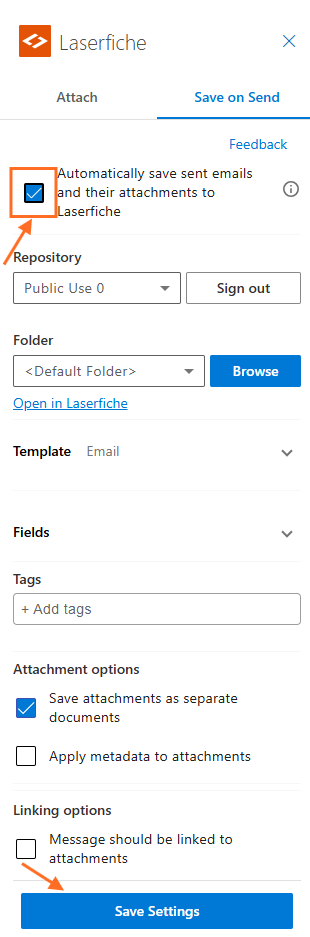
Warning: The Save on send feature must be enabled for every user in every mailbox used, or an error will be displayed. This includes shared mailboxes. Each user must enable Save on send the first time they access the shared mailbox following the installation of the Laserfiche for new Outlook Add-in.
Troubleshooting
Issue: In new Outlook or Outlook on the web, on sending email in a shared mailbox, an error is presented to the user:
"Message from Add-in: Laserfiche for new Outlook
Laserfiche for new Outlook is unavailable and can't process your email at this time."
Resolution:
- Open the shared inbox, and follow the instructions to enable Save on Send.
Issue: The Save on Send functionality is disabled and the user is instructed to contact their administrator
Resolution:
- Update the add-in to version 1.0.4 or later
Issue: The sent email is saved to Laserfiche but the category "Saved to Laserfiche" is not added. The user is instructed to contact their administrator.
Resolution:
- Grant Microsoft tenant-wide admin consent to allow the Laserfiche for Outlook app to tag the sent email via Microsoft Graph API.
Issue: The Save on Send does not work when using classic Outlook and a warning message is displayed every time an email is sent.
Resolution:
- Click the Send anyway button to continue to send the email, although it will not be saved to the repository.
- Use the new Outlook or Outlook on the Web for full functionality of this feature.
Known Issue
Issue: When replying to or forwarding an email that contains an inline image, and using Save on Send to save the outgoing message to Laserfiche, the inline image from the quoted/original message may be missing from the saved copy. The rest of the email (text and other attachments) saves correctly. Inline images newly added to a fresh email are not affected.
Workaround:
- Recommended: After the email is sent, find it in the Sent folder and manually save it to Laserfiche using the Upload pane — the same way you'd save any email to Laserfiche. Saving from the sent (already-delivered) copy retrieves the complete, original message file directly from the server, which reliably includes all inline images.
- Optional: If you'd rather not save the message a second time, you can save the original email (containing the image) directly, or manually attach the image as a regular file attachment before sending.
References (Microsoft):
- Add and remove attachments in an Outlook add-in — Microsoft Learn
- OfficeDev/office-js #4995 — behavior of getAttachmentsAsync for inline images is unstable
- OfficeDev/office-js #5031 — getAttachmentsAsync doesn't return inline images added via signature
- OfficeDev/office-js #6274 — inline cid images not loaded immediately after being added (10–20s delay)